Wednesday

A Thrifted Shelf!

Yay! I finally have a new post for everyone! I'm so excited to be back! Once again I want to say sorry to all for my absence.  Anyways, I have the cutest shelf to show you guys.  Where I live, we have the cutest thrift shop where all the proceeds are donated to the humane society, and the prices are a steal! I bought the cutest shelf for only $1! Life is good!

Now I know that with all of the craft blogs and Pinterest out there, it is no secret how to use some spray paint to refinish anything, but I really wanted to show everyone my finished product.  So without further adieu, here are a few items and steps I took to spruce up my shelf.

These are all the supplies I used to bring my shelf back to life.

The most important tool needed is a cold glass bottle of Cheerwine, or any other soda of your preference. (It was delicious!)

I spray painted it, (after I sanded it) a nice aqua shade of blue.  I'm in a very nautical, paradise mood lately!

My shelf was missing the hooks, so I bought some new ones real quick.  The nails are so tiny so be careful not to lose them!

Voila!  My shelf is all finished! I like that it isn't perfect.  It looks kind of distressed, just like my room right now.  I'm ashamed of how dirty I have been lately! No judging!

So that's it folks! Easy as can be! I challenge you all to find $1 finds and fix them up! They can have so much character. I'd love to see any pictures if you guys do the same! Glad to be back!
XOXO
Abby :)


*Linking up with Keep Calm & Link Up


Tuesday

Olioboard - Create Your Own Decorating Mood Board


Turquoise Dream Office by Niki on Olioboard

Hi.  I'm Niki, and I'm a Clip-aholic.  My whole life, I have been obsessed with magazine clippings.  Maybe it's because I soon forget things that inspire me, or maybe it's because I am somewhat of a hoarder who just can't stand the thought of getting rid of something I find beautiful, unique or useful.  I find many reasons to clip and many uses for the things I clip.  When I was a little girl, my cousin and I took my grandmother's (Memaw) Sears catalogs and created an entire doll house and dolls out of our clippings.  I outgrew the desire to play with paper dolls, but I haven't outgrown my love for clipping things and creating inspiration boards from them.  The hard part is finding what I clipped once I have taken the time to cut it out.  That's why I love the new website that I just discovered -- Olioboard

Olioboard is similar to pinterest in that you can clip online inspiration and pin it right to the catagory you want and you can browse from others' creations to find more inspiration.  However, it goes a step beyond by allowing you to create an entire room with your clippings. 

Olioboard Outdoor Oasis by Niki

With just a few clicks, you'll feel like a professional designer.  It's a simple process: pick your background, clip, place, rotate, adjust, save and publish.  Then you can see what your space will look like.  While you're there, stop by and follow me at www.olioboard.com/users/NikiKnows.  I'm sure that as time allows, my space will start filling up with my design ideas.


Happy Clipping!!

Niki

**Don't forget to follow HomeMadeville above!!**

Sunday

Baby Shower Banner Tutorial for the Craft Monkey Challenge

How to Make a Personalized Baby Shower Banner

I’m proudly waving my banner today over at Craft Monkey!  Heidi is hosting a DeStash Bash that you will certainly want to see.  Although the tutorial is here, you should head over to Craft Monkey to find out all the fun details of the challenge, as well as see what other craft bloggers can do when handed a box of random supplies.

With my amazing box of tools, I created a banner for the shower I co-hosted last month.  You can see all the shower decor and details here.

Personalized Baby Shower Banner Tutorial

Craft Monkey DeStash Bash Supplies Received

Items Used
*Hole punch                           *Sparkly, Pink Sand                                *Glue Stick
*Hot Glue Gun                      *Paper Cutters                                          *Scrapbook Paper   
*Letter Stencils                      *Embellishments                                      *Fishing or Florist Wire

Love my Circle Cutter!

Using my circle cutter, I cut circles from the solid pink paper.

Letter Stencils are Great for Those of Us Who Didn't Fare So Well in Handwriting.

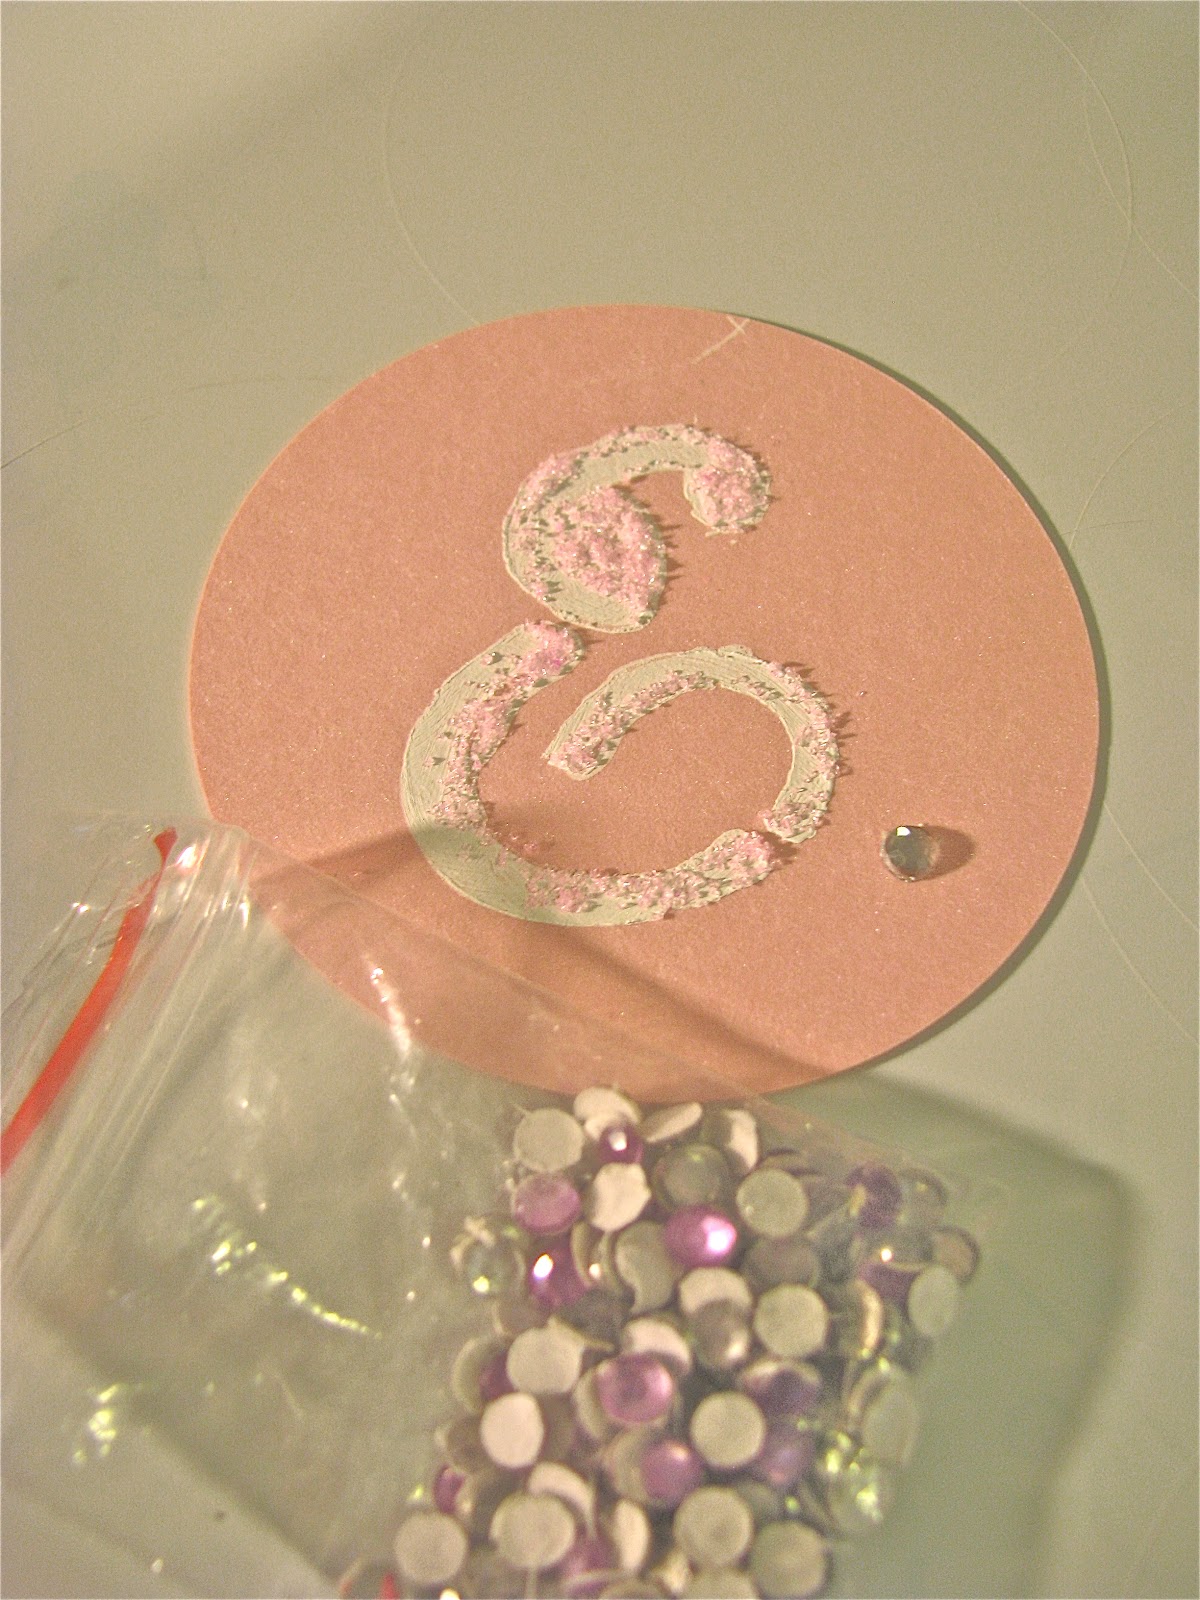
I stenciled the letters onto the circles with the white paint.

Sparkly, Colored Sand Can Be Used Just Like Glitter

I sprinkled the sparkly sand on the paint when it was still wet, so it would stick.

Embellishment Cut from Note Cards

Since Emma has four letters and Belle has five, I decided to cut a cupcake embellishment to go with the theme to create a fifth circle for Emma.

Gems Can Add a Little Bling to Your Banner

I glued the jewel like embellishments onto the E, B & Cupcake, just to add a little bling.

Scrapbook Paper...One of My Favorite Things!

I cut the patterned scrapbook paper into thirds.

How to Turn Scrapbook Paper into an Adorable Banner

Then I folded each strip like you probably folded fans back when you were in Kindergarten, accordion style.  I used fishing wire to hold it down in the middle.

Scrapbook Paper Circles Can be Used for Many Things!

Then I glued the ends together and held it together with paper clips until the glue dried.

Could Use for Cake Toppers, Room Decor, Table Settings & More

I hot glued the letter circles onto the patterned circles.

1/8" Hole Punch Worked Great.

Lastly, I used the small circle punch from my package to create holes on the back of my patterned circles, so that the string could go behind the banner.  In the pictures, I have used pink yarn, but for the actual baby shower I may add the blue/green & white string in my DeStash box.

Baby Shower Banner

Once the string was in place and tied onto wooden sticks, my banner was ready.  I used clear goblets and decorative rocks as my anchor.

Now head on over to Craft Monkey to see more on this banner and the other crafts created with Heidi’s DeStash Bash. 


Thanks, Heidi, for helping me personalize my friend’s baby shower in such a fun way.  


Friday

A Few Updates!

Hello to all! This is a random post with no tutorial or recipe, but just an update on where I've been.  As mentioned before, I'm a college student, and WOW have I been busy with finals! I took my last one at 9:00 this morning, and I was up till 4:30 in the morning studying! I just wanted to let everyone know, including Nikki, where I've been.  I bet you guys didn't know that Nikki and I live 5 hours apart, so a lot of times our blog is how we communicate.  Anyways, I'm back! I have a whole summer to come up with cute stuff for you guys!

P.S.- I found a lamp on the side of the road the other day that needs some sprucing up.  HINT HINT!

XOXO
Abby