
 |
| How to Make a Personalized Baby Shower Banner |
I’m proudly waving my banner today over at Craft Monkey! Heidi is hosting a DeStash Bash that you will certainly want to see. Although the tutorial is here, you should head over to Craft Monkey to find out all the fun details of the challenge, as well as see what other craft bloggers can do when handed a box of random supplies.
With my amazing box of tools, I created a banner for the shower I co-hosted last month. You can see all the shower decor and details here.
Personalized Baby Shower Banner Tutorial
 |
| Craft Monkey DeStash Bash Supplies Received |
Items Used
*Hole punch *Sparkly, Pink Sand *Glue Stick
*Hot Glue Gun *Paper Cutters *Scrapbook Paper
*Letter Stencils *Embellishments *Fishing or Florist Wire
 |
| Love my Circle Cutter! |
Using my circle cutter, I cut circles from the solid pink paper.
 |
| Letter Stencils are Great for Those of Us Who Didn't Fare So Well in Handwriting. |
I stenciled the letters onto the circles with the white paint.
 |
| Sparkly, Colored Sand Can Be Used Just Like Glitter |
I sprinkled the sparkly sand on the paint when it was still wet, so it would stick.
 |
| Embellishment Cut from Note Cards |
Since Emma has four letters and Belle has five, I decided to cut a cupcake embellishment to go with the theme to create a fifth circle for Emma.
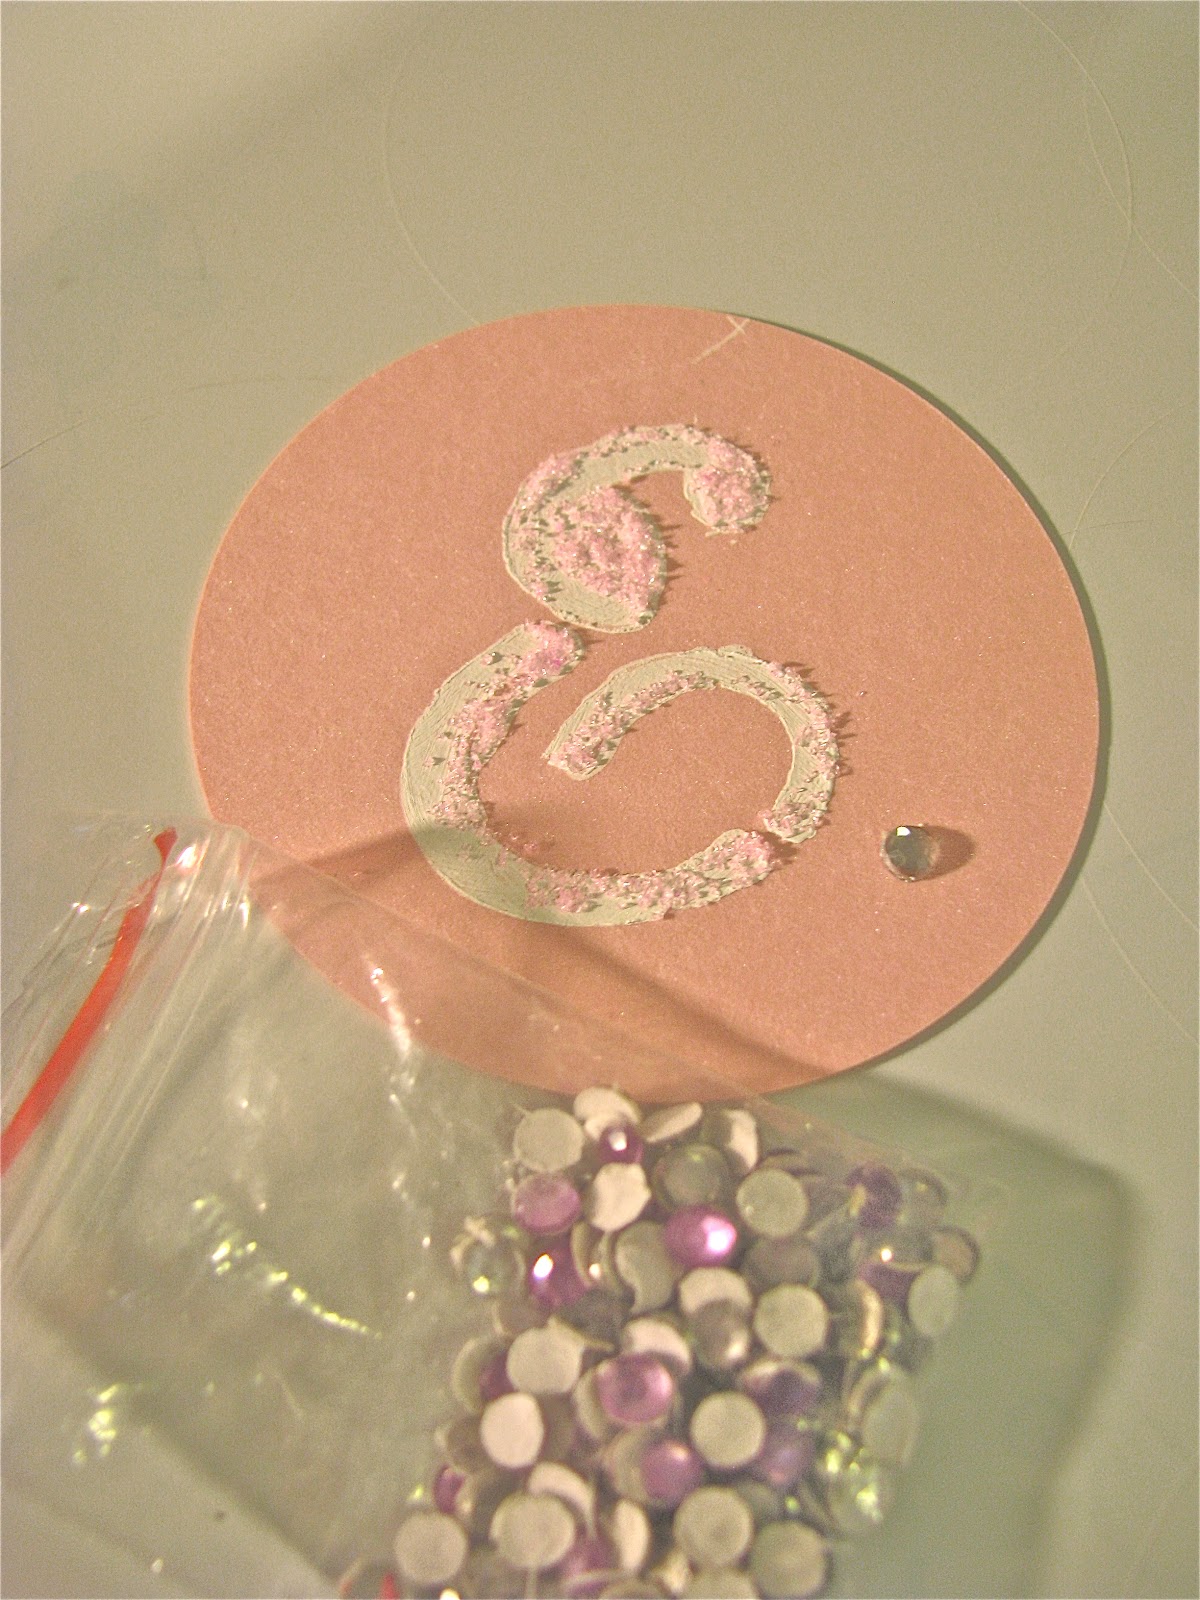 |
| Gems Can Add a Little Bling to Your Banner |
I glued the jewel like embellishments onto the E, B & Cupcake, just to add a little bling.
 |
| Scrapbook Paper...One of My Favorite Things! |
I cut the patterned scrapbook paper into thirds.
 |
| How to Turn Scrapbook Paper into an Adorable Banner |
Then I folded each strip like you probably folded fans back when you were in Kindergarten, accordion style. I used fishing wire to hold it down in the middle.
 |
| Scrapbook Paper Circles Can be Used for Many Things! |
Then I glued the ends together and held it together with paper clips until the glue dried.
 |
| Could Use for Cake Toppers, Room Decor, Table Settings & More |
I hot glued the letter circles onto the patterned circles.
 |
| 1/8" Hole Punch Worked Great. |
Lastly, I used the small circle punch from my package to create holes on the back of my patterned circles, so that the string could go behind the banner. In the pictures, I have used pink yarn, but for the actual baby shower I may add the blue/green & white string in my DeStash box.
 |
| Baby Shower Banner |
Once the string was in place and tied onto wooden sticks, my banner was ready. I used clear goblets and decorative rocks as my anchor.
Now head on over to Craft Monkey to see more on this banner and the other crafts created with Heidi’s DeStash Bash.

Thanks, Heidi, for helping me personalize my friend’s baby shower in such a fun way.